-
[Android] 버튼 이벤트 구현해보기 1BACK-END/Android 2020. 11. 9. 14:35
| Java에서는 main함수, Android에서는 MainActivity함수
안드로이드 스튜디오에서는 Activity 라는 클래스를 활용해서 폰이라는 틀을 만들고,
폰 안에 띄울 내용들을 onCreate(매개인자1) 함수로 로드한다.

| java, res
폴더를 크게 java, res 로 나누고 res 에서는 아래와같은 자원들을 관리한다.
- 레이아웃, 그림, 패턴, 칼라, 스타일, 글꼴, 메뉴
이런 자원들은 R.java에 int static 상수로 등록이 된다.
static 이기 때문에 다른곳에서 이 자원들을 사용할때는 R.layout, R.drawable 과 같은 방식으로 접근한다.
| 과제
버튼1 ) 그림이 5개 있고 이 그림을 순서대로 화면에 띄우고 5번째가 됐을때는 다시 1번째 그림을 띄운다.
버튼2 ) Intent 클래스(DTO역할)을 사용하여 Two.java 문서로 값을 전달한다.
버튼3 ) alert("닫기");

| Test.java
| activity_test.xml
이렇게 두개는 짝꿍이다.

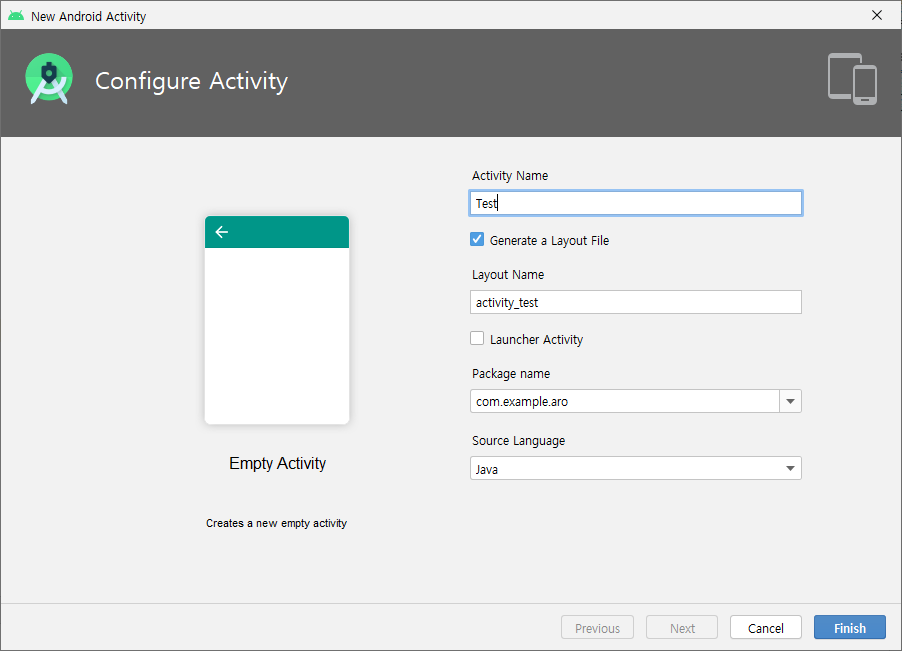
| New - Activity - Empty Activity

| 이름을 Test로 했더니 Latout Name 이 자동으로 activity_test 가 된다.
| 이제 activity_test 를 사용할테니 기존의 activity_main 은 따로 메모장에 써두자
<?xml version="1.0" encoding="utf-8"?>
<androidx.constraintlayout.widget.ConstraintLayout xmlns:android="http://schemas.android.com/apk/res/android"
    xmlns:app="http://schemas.android.com/apk/res-auto"
    xmlns:tools="http://schemas.android.com/tools"
    android:layout_width="match_parent"
    android:layout_height="match_parent"
    tools:context=".MainActivity">

    <TextView
        android:layout_width="wrap_content"
        android:layout_height="wrap_content"
        android:text="박단비 안드로이드"
        android:textSize="20pt"
        android:background="#A593E0"
        app:layout_constraintBottom_toBottomOf="parent"
        app:layout_constraintLeft_toLeftOf="parent"
        app:layout_constraintRight_toRightOf="parent"
        app:layout_constraintTop_toTopOf="parent" />

</androidx.constraintlayout.widget.ConstraintLayout>
| TextView 를 다 지워버리고 2라인을 리니어레이아웃 LinearLayout 으로 변경해준다.
| android:orientation="vertical" 를 8라인에 추가해준다.
<?xml version="1.0" encoding="utf-8"?>
<LinearLayout
    xmlns:android="http://schemas.android.com/apk/res/android"
    xmlns:app="http://schemas.android.com/apk/res-auto"
    xmlns:tools="http://schemas.android.com/tools"
    android:layout_width="match_parent"
    android:layout_height="match_parent"
    android:orientation="vertical"
    tools:context=".MainActivity">
</LinearLayout>
| drawable에 사진 몇가지를 paste 해준다.

전 
후 전 후 | LinearLayout 를 줄여서 LL 로 기술하겠다.
| LL 안에 TV, IV, BT 를 작성해준다.
<?xml version="1.0" encoding="utf-8"?>
<LinearLayout
    xmlns:android="http://schemas.android.com/apk/res/android"
    xmlns:app="http://schemas.android.com/apk/res-auto"
    xmlns:tools="http://schemas.android.com/tools"
    android:layout_width="match_parent"
    android:layout_height="match_parent"
    android:orientation="vertical"
    tools:context=".MainActivity">

    <TextView
        android:layout_width="match_parent"
        android:layout_height="wrap_content"
        />

    <ImageView
        android:layout_width="wrap_content"
        android:layout_height="wrap_content"
        />

    <Button
        android:layout_width="match_parent"
        android:layout_height="wrap_content"
        />

</LinearLayout>
| 변경된 LL
<?xml version="1.0" encoding="utf-8"?>
<LinearLayout
    xmlns:android="http://schemas.android.com/apk/res/android"
    xmlns:app="http://schemas.android.com/apk/res-auto"
    xmlns:tools="http://schemas.android.com/tools"
    android:layout_width="match_parent"
    android:layout_height="match_parent"
    android:orientation="vertical"
    tools:context=".MainActivity">

    <TextView
        android:id="@+id/tvInfo"
        android:layout_width="match_parent"
        android:layout_height="wrap_content"
        android:text="First Danbi android App"
        android:textSize="15pt"
        android:gravity="center"
        android:background="#FFFF00"
        />

    <ImageView
        android:id="@+id/myImg"
        android:layout_width="match_parent"
        android:layout_height="match_parent"
        android:src="@drawable/apple"
        android:scaleType="center"
        />

    <Button
        android:layout_width="match_parent"
        android:layout_height="wrap_content"
        />

</LinearLayout>
| 실행 버튼

| 출력결과

| 너무 심플해서 그림만 바꿔서 한번 더 출력해봤다.

| 번호 옆에 이미지 버튼이 나타난다. 버튼을 누르면 사진과 제목을 바로 확인할 수 있다.


| 현재 폴더구조

| File - Settings - Editor - General - Auto Import 에 두개를 체크해주자. 자동으로 임포트 되어 편하다.

| MainActivity.java
아까 res 에 등록한 것들이 static int 로 자동 상수화 된다는것이 이것이다.

| match_parent 와 wrap_content의 차이?
가로 match_parent 왼쪽 시작에서 오른쪽 끝까지 / div 태그와 비슷 세로 match_parent 현재 위치부터 마지막까지 
가로 wrap_content 왼쪽에서 글자 영역만큼 / span태그와 비슷 세로 wrap_content 현재 위치에서 크기만큼 
| 자바 기초에서는 이벤트를 어떻게 처리 했을까?
ActionPerformed, addActionListener, aw.getSource ....
5개월 전에 했던거라 기억이 잘 나지 않는다 ㅠㅠ 복습의 중요성을 또 깨닫게된다.
오늘은 1차 프젝 채팅 프로그램 복습해야지.
결론 : 그때 메인에 bt1.addActionListener 를 기술했었다.
| 그럼 안드로이드는?
안드로이드 API 사이트에서 Button의 OnClick 메소드를 어떻게 기술해야 되는지 살펴볼수 있다.
public class MyActivity extends Activity {
     protected void onCreate(Bundle savedInstanceState) {
         super.onCreate(savedInstanceState);

         setContentView(R.layout.content_layout_id);

         final Button button = findViewById(R.id.button_id);
         button.setOnClickListener(new View.OnClickListener() {
             public void onClick(View v) {
                 // Code here executes on main thread after user presses button
             }
         });
     }
 }

 // https://developer.android.com/reference/android/widget/Button
괄호 안에 매개인자가 OnClickListener 라고 한다.

뭐?! OnClickListener라고?! 그렇다면 바로 new 를 적어준다.

그리고 Vi까지 치고 엔터를 하면 바로 자동완성이 완성된다.

아까 작성해둔 my 배열을 안에 넣어준다.

| 완성 소스 MainActivity.java
package com.example.aro;

import android.app.Activity;
import android.os.Bundle;
import android.view.View;
import android.widget.Button;
import android.widget.ImageView;
import android.widget.TextView;

public class MainActivity extends Activity {
    TextView tv;
    ImageView iv;
    Button bt1, bt2, bt3;
    int my[]={R.drawable.apple, R.drawable.banana, R.drawable.melon};
    int cnt = 0;

    @Override
    protected void onCreate(Bundle savedInstanceState) {
        super.onCreate(savedInstanceState);
        setContentView(R.layout.activity_main);

        bt1 = this.findViewById(R.id.button1);
        iv = this.findViewById(R.id.myImg);

        bt1.setOnClickListener(new View.OnClickListener() {
            @Override
            public void onClick(View v) {
                iv.setImageResource(my[cnt]);
                cnt++;
                if(cnt==3) cnt=0;
            }
        });
    }//onCreate end
}//class end
| 완성 소스 activity_main.xml
<?xml version="1.0" encoding="utf-8"?>
<LinearLayout xmlns:android="http://schemas.android.com/apk/res/android"
    xmlns:app="http://schemas.android.com/apk/res-auto"
    xmlns:tools="http://schemas.android.com/tools"
    android:layout_width="match_parent"
    android:layout_height="match_parent"
    android:orientation="vertical"
    tools:context=".MainActivity">

    <TextView
        android:id="@+id/tvInfo"
        android:layout_width="match_parent"
        android:layout_height="wrap_content"
        android:background="#FFFF00"
        android:gravity="center"
        android:text="First Danbi android App"
        android:textSize="15pt" />

    <Button
        android:id="@+id/button1"
        android:layout_width="match_parent"
        android:layout_height="wrap_content"
        android:text="그림변경"
        android:textSize="10pt" />

    <ImageView
        android:id="@+id/myImg"
        android:layout_width="match_parent"
        android:layout_height="match_parent"
        android:scaleType="center"
        android:src="@drawable/sun" />


</LinearLayout>
| 실행 결과
그림변경을 누르면 사진이 변경된다.


'BACK-END > Android' 카테고리의 다른 글
[Android] 버튼 이벤트 구현해보기 2 (0) 2020.11.10 [Android] 안드로이드의 Alert창, Toast 사용방법 (0) 2020.11.09 [Android] Android Studio 개발환경 설정 (0) 2020.11.09 [Android] 앱 인벤터 (0) 2020.11.09 [Android] 안드로이드 스튜디오 설치하기 (0) 2020.11.09
 #Swift #iOS
Today